Woick Weather Camera on November 13, 2011 using Indeo
Monthly Archives: November 2011
woicik_lapse_20111112.avi
Woicik Weather Camera for November 12, 2011
ImageSalsa and Logitech QuickCam
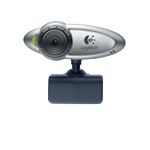
I had a Logitech QuickCam for Notebooks laying around for web chats. I recently replaced it with a Microsoft LifeCam VX-800 in an attempt to address from audio feedback issues. I also have an old Toshiba Protégé TabletPC.
 I connected the QuickCam to the TabletPC and then installed the demo version of ImageSalsa. I read through the ImageSalsa manual. I created a new portfolio and a new canvas. I followed the instruction to enable the camera and add it as a graphic. I was able to see the video feed in ImageSalsa. I did a text overlay of the date and time.
The first issue I had was the image appeared to be fuzzy. I wasn’t sure if it was the software or the TabletPC screen. But then I remembered the QuickCam has a manual focus ring. I played with that and was able to get a sharper image but still wasn’t happy with the sky image. It was an overcast afternoon but the clouds were completely washed out in ImageSalsa. The resolution was only 320 x 240 which I thought might have something to do with it.
I decided to try the LifeCam next. This time the image was completely wrong like the RGB values were off. I did some web searching and found a reference on Microsoft’s knowledge base that there may be driver issues if a Logitech camera was installed first. So, I uninstalled the Logitech drivers but the image was still wrong. I also looked for LifeCam drivers but there weren’t any for this model.
I did some more research and also found many new web cameras that had auto-focus and HD resolution. I started to think that if I am going to go through all the effort to setup a weather camera, maybe I should have a decent camera.
How to setup up a Vantage Vue weather station?
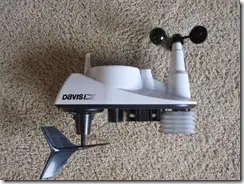
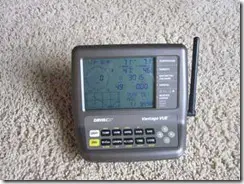
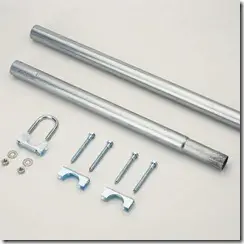
 The Vantage Vue arrived. Inside the box was the Integrated Sensor Suite (ISS) and the console. I also ordered a pole mounting kit.
The Integrated Sensor Suite was basically pre-assembled and looked a lot better as a single unit than my previous weather station. There was a brief assembly process to attach the wind cups, wind vane, debris screen, rain collector tipping spoon assembly and the battery. It went together very quickly.
 I next added three “C” batteries to the console unit and followed the initial startup procedures. The only thing that I had to look up was my latitude and longitude. Once it was turned on, the console and sensor suite started communicated wirelessly.
 I took a look at the pole mounting kit. It was basically two interlocking metal tubes. The manual said it was designed to connect to a wood post. However, I was going to mount next to another metal post that is part of a chain linked fence in my backyard. So, the next day I went to a hardware store to get a longer metal pipe. The requirements were the post needed to be between 1” and 1-3/4”. Their mounting kit was 1-1/4” so I figured that was the best size. I had a slight issue thinking about how to get a 10’ metal pipe into my SUV. But, it fit.
The next day I cut the 10’ pipe into two sections to make it easier to wrap the bottom section around the existing fence pole and secure that with straps. I then used a coupler for the top section. I took the top section and attached the sensor unit. I then took that whole assembly outside and attached it to the bottom section. It looked great!!!
I checked the console unit and date was flowing in. I took a quick glance at the console manual and found the command to reset all the data. My next step is to read the console manual and figure out all the features.